I’ve been doing a lot of bird photography lately. These are 6 images that describe my progression.
1. European Starling (f/5.2, 1/640, ISO100, 600mm equivalent)
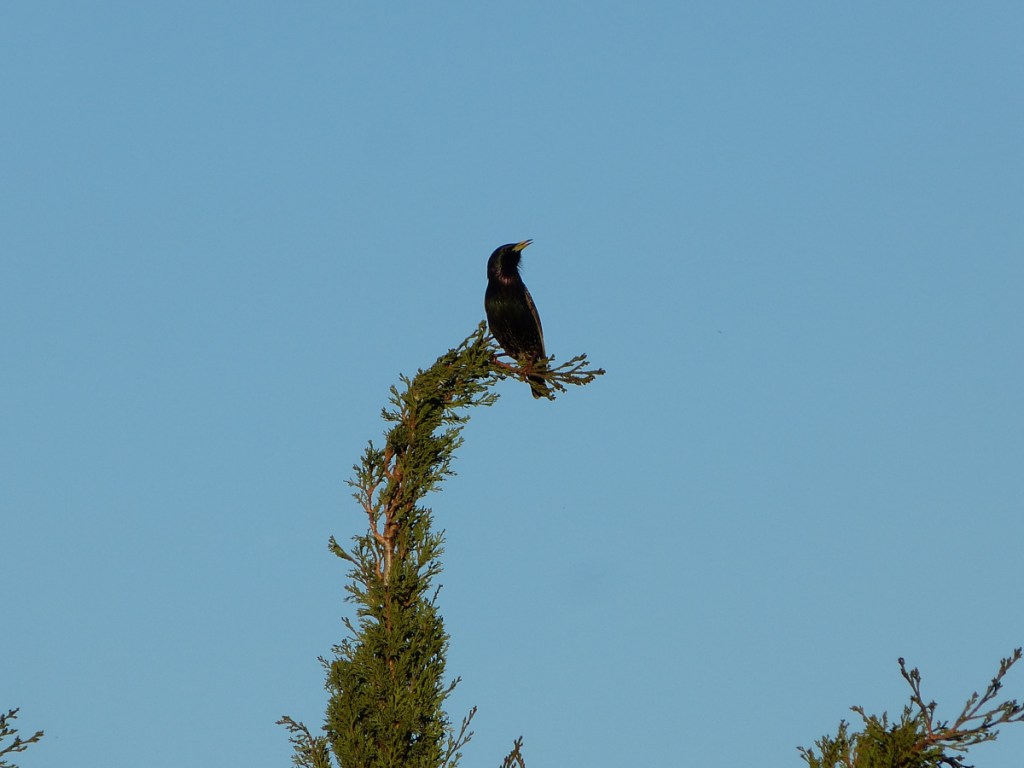
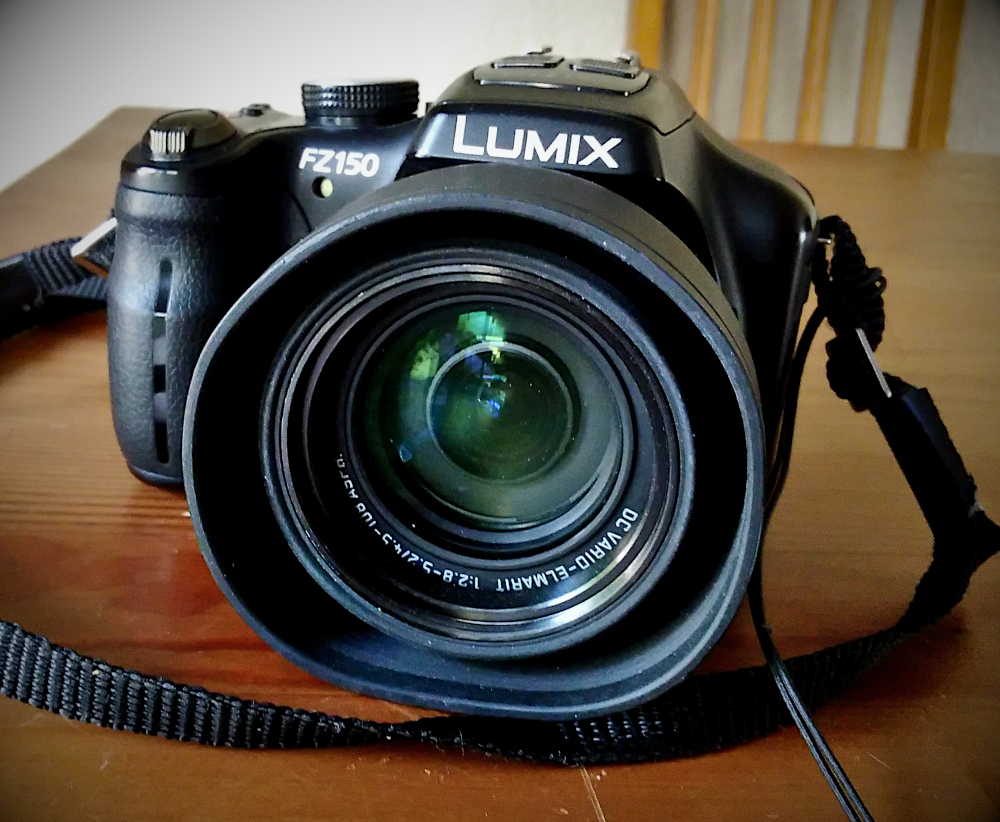
This was my first “real” attempt at wildlife photography. I had taken pictures of animals before, but I now purchased a camera expressly for this purpose. I was mainly fixated on the times of zoom, because for wildlife, you need to zoom way out there! Doing some research, I learned that 40x zoom is good, 60x is better, but 20x is the minimum (this is a silly way to choose a camera, but what did I know). I went to the camera shop to browse, and I saw this used camera for around $80… with 24x zoom! It even looked like a real camera. A fool and his money are soon parted, but on this day, I was a lucky fool. It turned out I purchased a decent bridge camera (that bridges the gap between a professional and consumer camera), the Panasonic FZ150. I took my new toy home, learned how to set it to Intelligent Auto mode and focus on a subject. Outside my condo, I found this starling, zoomed all the way in, and pressed the shutter button. My aim was to capture each species I encountered, and this was the first of many.
2. Little Penguin (f/5.2, 1/30, ISO400, 600mm equivalent)
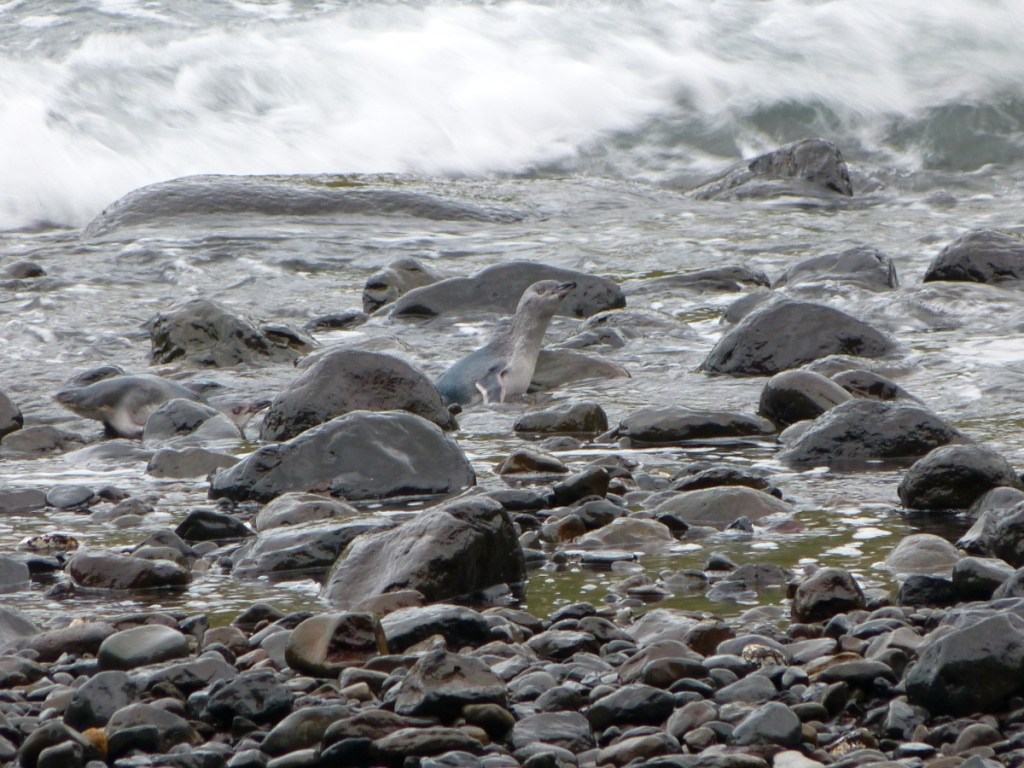
For the next two years, I happily pointed-and-shot images of birds at local parks. Because of the pandemic, my wife and I had not traveled for 3 years. We decided to treat ourselves to a trip to New Zealand. Part of our goal was to see wild penguins. My wife booked a visit to Pohatu Marine Reserve on the South Island, where they had a breeding colony of little penguins. To blend in with the light blue waters of their home, Flea Bay, these penguins evolved lighter plumage. This subspecies is known as the white-flippered penguin due to the color on the leading and trailing edges of their flipper. They live a tough life, scampering up to a quarter mile over rough terrain from their nests to the bay at the crack of dawn. After a full day of fishing, they return under the safety of dusk, as you see in the image (look closely and you’ll see two penguins). This image is rather grainy from the lack of light, but my trusty Panasonic captured the memory, and I did not come home empty-handed.
3. California Condor (f/5.2, 1/160, ISO800, 600mm equivalent)

This photo is a success and failure at the same time. It is over-exposed and out of focus. On the other hand, I got an up-close, in-flight photo of a California Condor! There are only a few hundred of these birds in the wild, and they are currently being hit hard by avian flu. One of the few places to see them is Pinnacles National Park, an easy drive from the Bay Area. When I asked a ranger to recommend a good place for viewing Condors, she replied dryly, “San Diego Zoo.” My heart sank for a moment. I didn’t know if she was joking or serious. Being able to spot these giant birds was a matter of telling them apart from turkey vultures, and being at the right place at the right time. We were told to hike up to the high peaks before 10 am, or after 5 pm. My wife and I hit the trail in the afternoon and were lucky to run into people who gave us a general sense of where they saw condors. All we had seen up to that point were turkey vultures. After another mile or so, we spotted condors in the distance and decided to stop, as we were running out of daylight. The spot was a narrow pass between two hills, which was fortuitous because any bird flying through would pass close by. My wife found a nice overlook while I chose a place where I could see the birds coming. Right on cue, three condors glided through the pass. The radio tags on their wings were obvious to the naked eye. “They’re here! They’re here!” I shouted with excitement. Rookie mistake: my camera was turned off. By the time it was ready, the birds were long gone. The best I could do was hope for another opportunity. Since these condors were in a generous mood, they circled around for a second pass, and I was able to snap the image you see.
With the focal length (zoom) I had, the bird nicely filled the frame, but it took precious time to acquire it in the viewfinder. There was only a second or two to focus and shoot before the bird soared into the sunset. I didn’t give my 12 year old camera enough time, and its Intelligent Auto settings had latched onto something other than the condor. I started to wonder if a more modern camera would have made the shot. Those scant seconds may have been a once-in-a-lifetime chance. One thing was for sure, I was going to learn to control the camera to maximize its potential, instead of relying on auto-everything.
4. Western Bluebirds (f/5.2, 1/640, ISO400, 600mm equivalent)
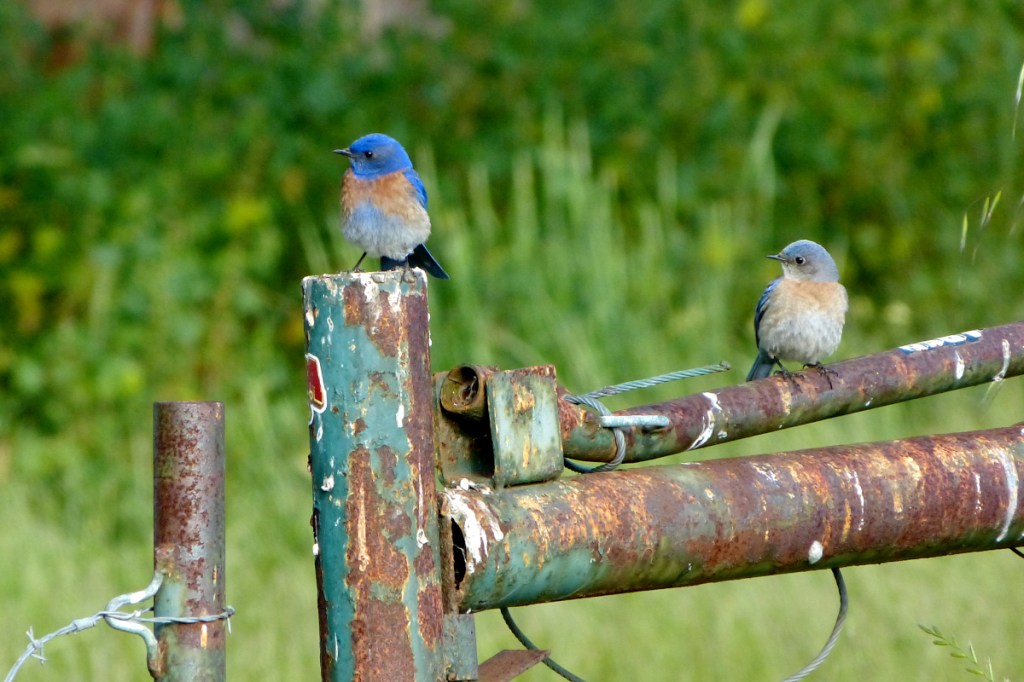
I would call this the best image I’ve taken to date. The cute little birds have beautiful colors, which are complemented by the rusted old gate. The background is far enough to be blurred so the subjects can stand out. The light was diffused by thin clouds, which eliminated harsh highlights. It would be a lie if I said I planned any of it. I had been out looking for birds to photograph with no success. These beauties turned up and my first instinct was just to get a shot, because birds can fly away in an instant. Luckily they hung around until I got a good shot. When shooting at long focal lengths, every movement of the camera is amplified, so only a few shots end up sharp.
By this time, I had started submitting my photos to Shutterstock, which is not so easy with an old point-and-shoot camera. They are very strict about noise, exposure, and focus, so a lot of my initial images were rejected by their screening bot. I learned to shoot on sunny days so I could shoot at low ISO, to avoid excess noise. I also learned to do some image processing in GIMP, a free photo editing software. The image of the bluebirds make use of tools such as noise reduction, unsharp mask, color levels, and cropping for a pleasing image (hopefully).
5. Canada Geese (f/5.2, 1/1000, ISO250, 600mm equivalent)
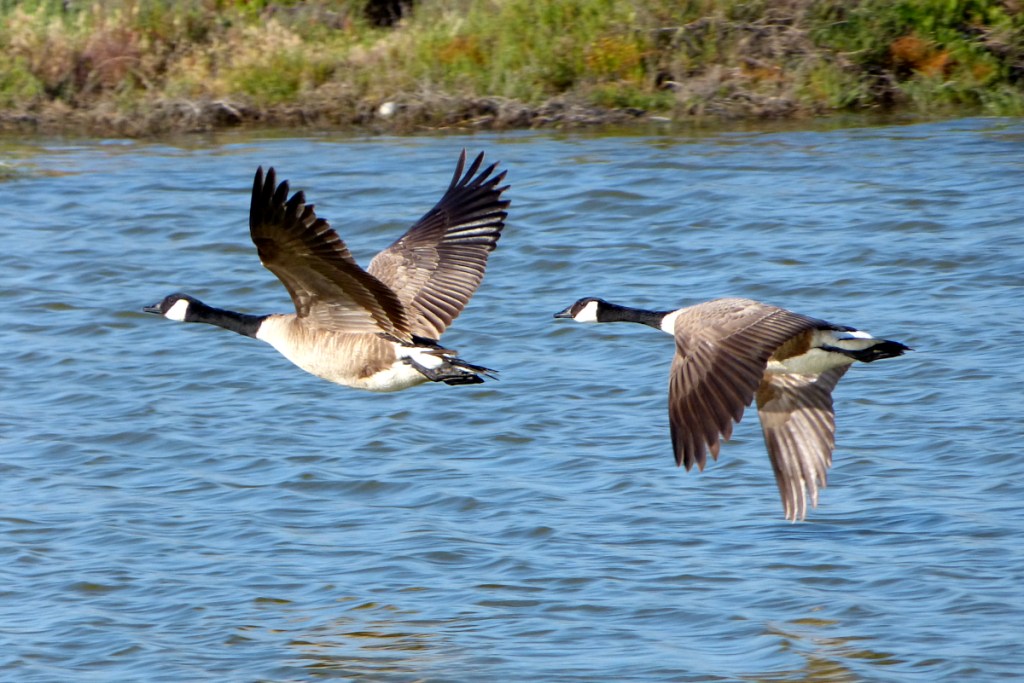
“Birds in flight,” or BIF for short, is a genre of bird photography that is held in high esteem, because it’s hard for both the photographer and the camera. The smaller the bird, the faster they are, and the greater the challenge. Most of the time, I’m just happy to get the birds in frame, much less in focus. An experienced photographer can set up in a place where birds have a high likelihood of flying past, but that requires knowledge of bird behavior and the location. I was photographing birds at a small pond next to the Bay Trail in San Leandro, CA. There were American avocets, black-necked stilts, and these geese. I set up with the sun and wind to my back. The geese became very vociferous, which was as a sign they might take off. It was enough of a heads-up that I was able to line up and fire off a burst of shots. Luckily, a couple of them were sharp, and I chose this one because of the wing positions. Notice the birds are already flying away from me at this point. When I get better, I hope to get photos of birds coming towards me. The shutter speed was 1/1000 of a second, which was not quite fast enough to stop the wingtips from blurring. I was already at ISO 250, so increasing the shutter speed would have forced me to use a high ISO (with more noise). Such are the limitations of shooting with a tiny 1/2.3″ sensor and a fixed lens.
6. Acorn Woodpecker (f/5.2, 1/30, ISO400, 600mm equivalent FL)
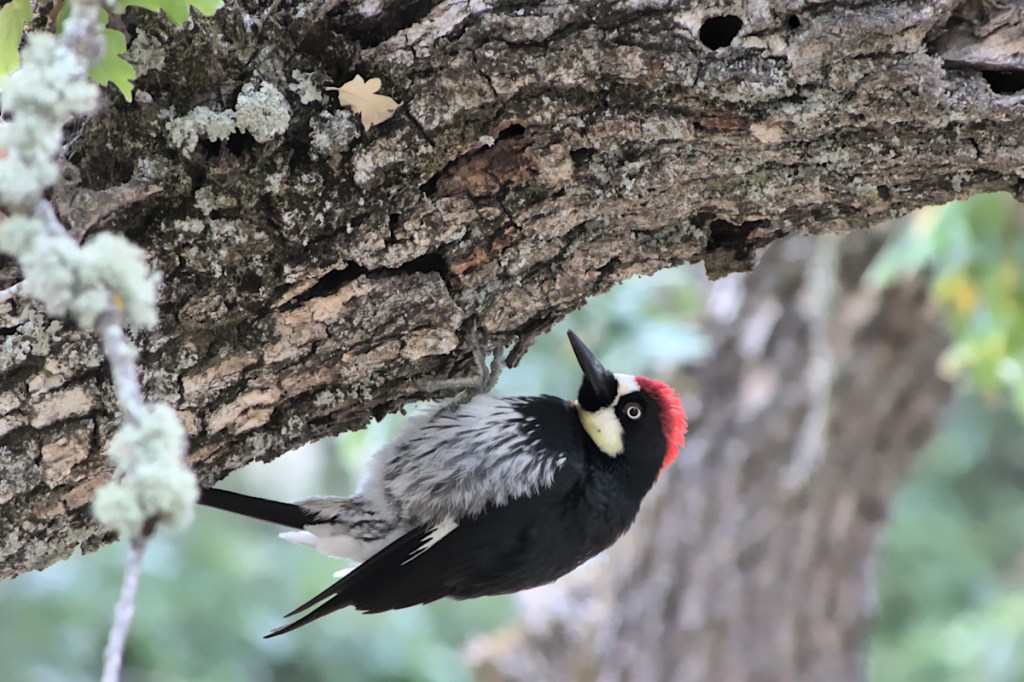
This image was taken a couple of days ago. I didn’t think I could get a good photo under these conditions, so I am astounded by it. My wife and I had just moved, and I wanted to see which birds could be found at the local regional park. It was partly sunny when we left, but thick clouds steadily rolled in. I was quite sure I would not get good photos. The birds at this park were skittish, so I walked a ways without exposing a single frame. Finally, I heard some telltale pecks near a large oak. An acorn woodpecker was quite close, clinging to the underside of a branch (wow, even less light). I mostly shoot in shutter priority to catch birds in flight, so I set the shutter speed while the camera chooses the ISO, with an imposed upper limit of 400. According to the camera, I needed to use a shutter speed of 1/30 to properly expose this image. A rule of thumb in photography is to use a shutter speed equal or greater than your focal length. With my lens zoomed out to 600mm equivalent of a full frame camera, the rule suggests using 1/600 to avoid motion blur. Compared to that, 1/30 is 20 times slower. My camera has image stabilization, which helps, but it is a 12 year old design, so I had my doubts. Luckily, digital cameras cost nothing to shoot, so I fired away, trying to keep my body as still as possible. Notice the penguin image above was also shot at 1/30, but ignorance was bliss back when I shot it.
When I got home I was surprised to see a few sharp, well-exposed images. This was the first time I shot images in RAW, which is an unprocessed image, sometimes referred to as a “digital negative.” We are accustomed to RAW images being automatically processed by the camera to produce a jpeg file, which can be shared immediately. The advantage to shooting in RAW is the potential to custom process each photo, for example, to tease out details in an underexposed image. Even with being shot in low light at ISO400, the image cleaned up nicely. This image challenges my notion of which conditions I can shoot in, as well as what my camera is capable of.
Conclusion
A poor carpenter blames his tools. I could have attributed my missed shots to my camera, but I suspected that I had a lot to learn before reaching its limit. I will get a nicer camera some day, but that too, will have its limitations. The skill to get the most out of any equipment is earned through experience. I can’t say it’s hard work because it is too much fun. Getting a bird framed up and pressing the shutter button releases a dose of dopamine, I am sure of it.
Visit my Printify shop for prints of my best photos.
