Introduction
Bird photography usually involves using a telephoto lens, which magnifies the subject, but also any camera movement. Motion blur and long lenses go hand in hand. Birds dictate the time and place for their portraits, which may have inadequate lighting. Low light calls for slow shutter speeds, which again puts a premium on stability. Image stabilization can only go so far with long focal lengths, so what to do? A tripod or monopod is the obvious answer, but I favor mobility, speed, and minimalism. Luckily, we have stable positions from rifle marksmanship, which are readily adapted to photography without any additional gear.
First, the Basics
Squeezing the shutter. Do so with a smooth continuous squeeze, not a harsh push that will jerk the camera and blur your image.
Eyecup contact. The eyecup for the EVF should be in firm contact with the face for stability. I press the eyecup against my glasses. Non-glasses wearers brace it against their brow. This is the analog of the “cheek weld” in rifle marksmanship.
Breath control. Breathing is movement that your image stabilization will have to compensate for. Hold your breath before squeezing the shutter. I usually exhale halfway before holding. You should have a few seconds of stability before your heart starts to pound. Take deep breaths beforehand to oxygenate the blood for extended stability.
Natural point of aim. This important concept involves finding a position where most of your muscles are relaxed. Muscles tire and shake easily. To find your natural point of aim (NPOA), follow these steps:
- Point your camera at an object as if to photograph it
- Close your eyes
- Keeping your feet planted and your camera level, gently swing side to side (from 11 o’clock to 1 o’clock) using your torso.
- Gradually swing less and less until you come to a stop. This is your NPOA.
- Open your eyes. Are you still pointed at your original object? As long as you are close, it will not take much muscle tension to hold your aim. If needed, adjust your feet and repeat from step 1. Turning the toes of one foot in or out will change the NPOA.
Here is a video of steps 3 and 4:
The point is not to do this exercise every time you take a photo, but to practice until you get the feel for your NPOA. Each time you aim your camera, you should be close to it. If you have time, move your feet to aim the camera instead of twisting your torso.
When you are at your NPOA, breathing will only move the camera up and down, without any side-to-side motion. This is a quick way to check if you are truly there.
The Hasty Sling
I think most of us use a strap or sling, especially with long, heavy lenses. Rifle shooters invented this technique to improve stability on the move. Tension in the sling connects the camera and your arms to your torso, quieting stray movement. It is quick to employ and can be used in various positions.
To use get into the hasty sling position, follow these steps:
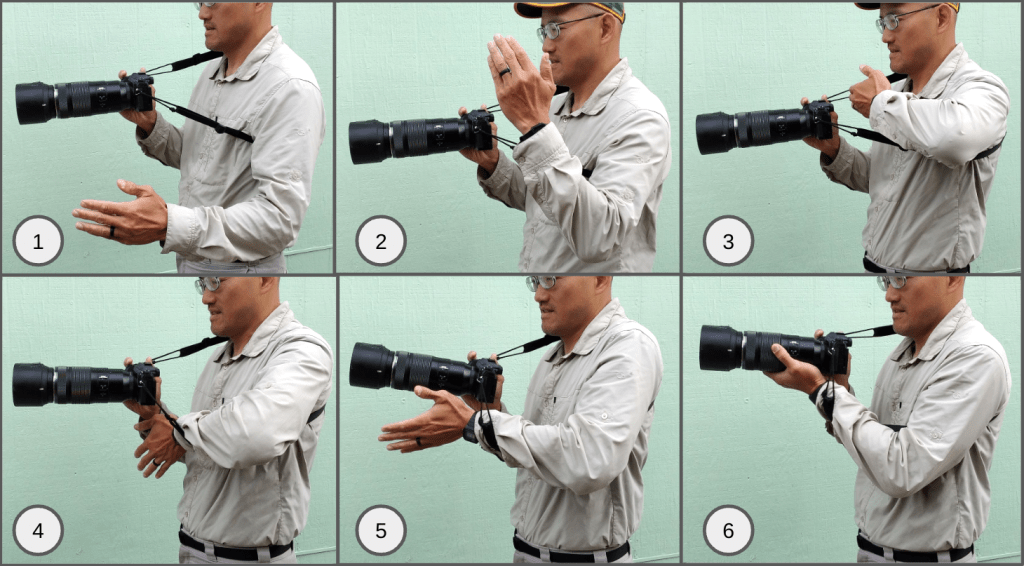
1. Start with the sling over your right shoulder and under your left arm.
2-3. Put your left hand through the sling. Your elbow should remain outside the sling.
4-5. Wrap the sling around the outside of your wrist. The rest of the sling is under your left arm.
6. Grip the barrel of the lens. There should be a nice tension when you look through the viewfinder; adjust the length of your strap so it is snug, but not uncomfortable. I generally like to keep my elbows close to my body to avoid further movement.
Here is a video of this process:
Because the shutter button is always on the right, employing the hasty sling with the left arm is the most natural. What if your shoulder gets sore, and you want to change sides? You can use the hasty sling on the right. Just remember to switch the sling over your left shoulder. Since your right hand is closer to your body, there will be more slack to take up. You might need another half or full wrap around the right hand.
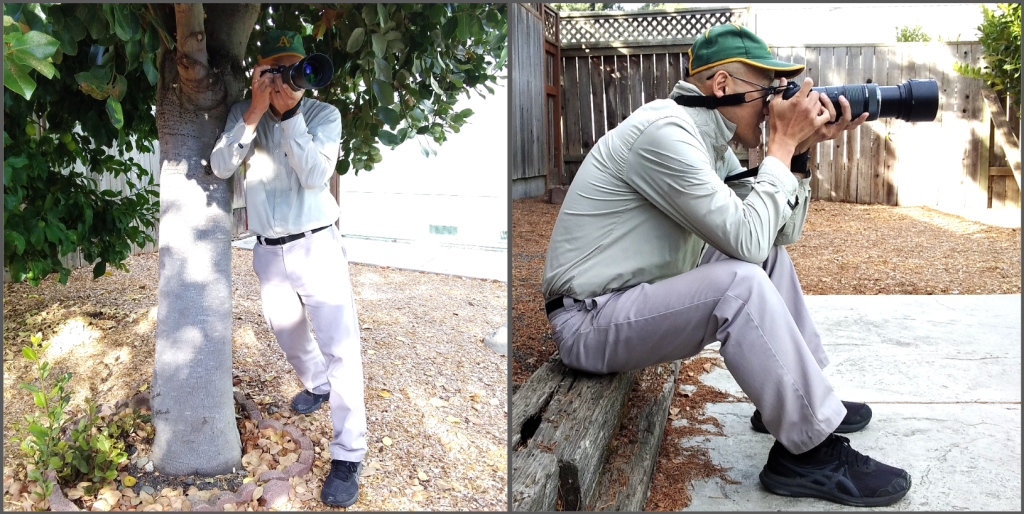
Use Support
If there is a tree, rock, or structure, take advantage of it. Lean against or sit on it to boost stability. Notice that you can use the hasty sling while you do this. Also, try to keep both elbows supported if possible.
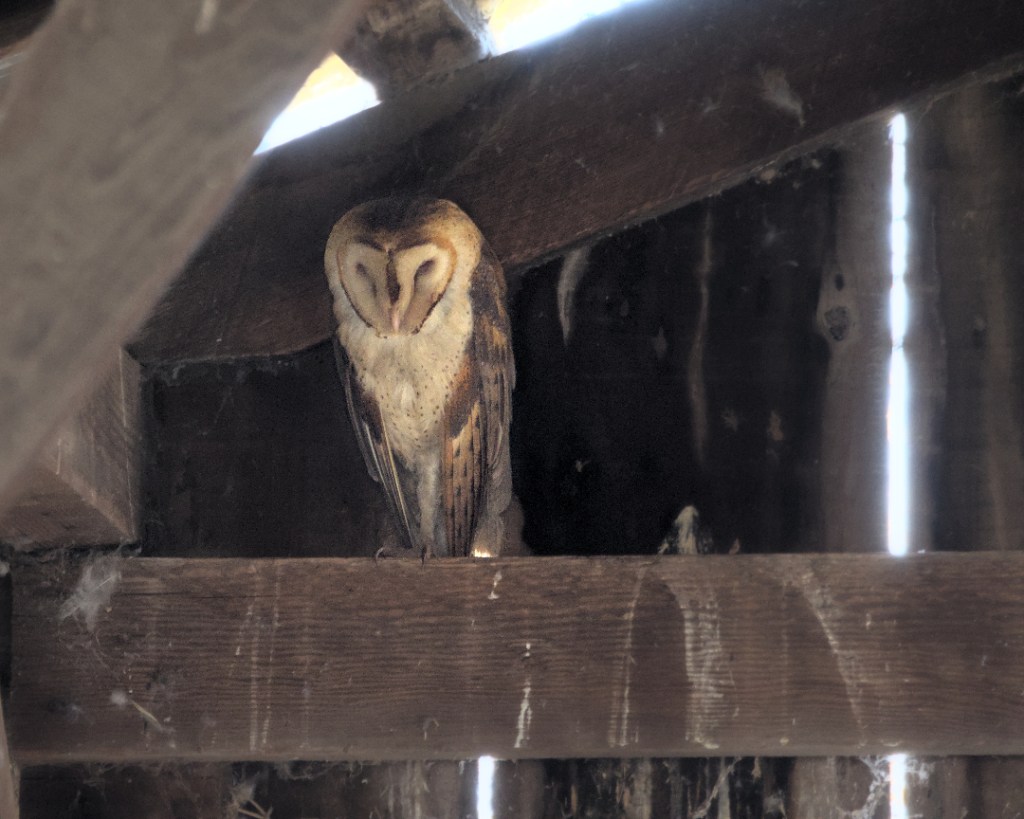
I took a photo of this barn owl at 1/40s and 400mm, because the interior of the barn was so dark. I braced myself against a chain link fence. Out of a number of shots, I ended up with a few sharp ones.
Shooting Positions
To be honest, I use standing and squatting positions 99% of the time. They keep my clothes clean and are fast to get in and out of. I will discuss these positions from the tallest to the shortest. There may be obstacles that better suit one position over another. Also, photos look nice when the bird is at eye level. Notice that I am using my sling in all but the prone position. For more authoritative instruction on shooting positions, there are plenty of sources online.
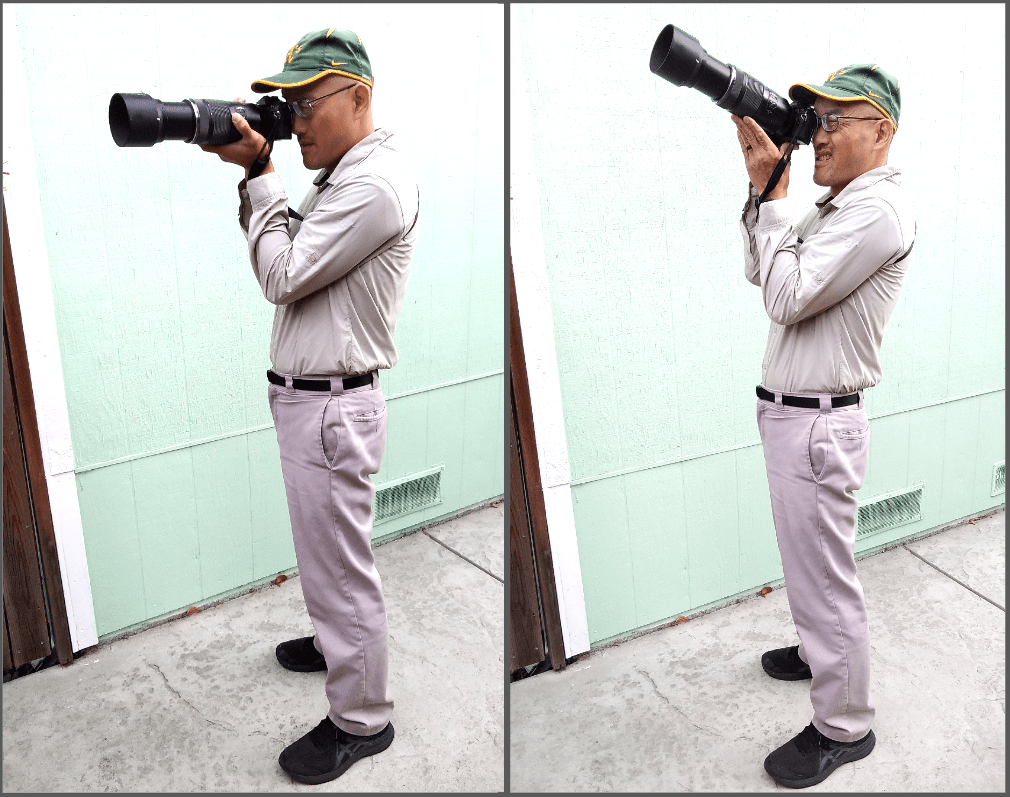
Standing position. This is all about finding your NPOA. I put the same foot as my lead arm slightly forward, akin to the Weaver shooting position. It is also possible to have your feet parallel, like the isosceles shooting position. I keep my left elbow resting on my rib cage, with the right elbow tucked against my side. I almost always use the hasty sling when standing, because it is the least stable position. Try to be as relaxed as possible, with your weight over your feet. To aim higher, you can prop up the camera on your fingertips. It is easiest to adjust your point of aim when standing.
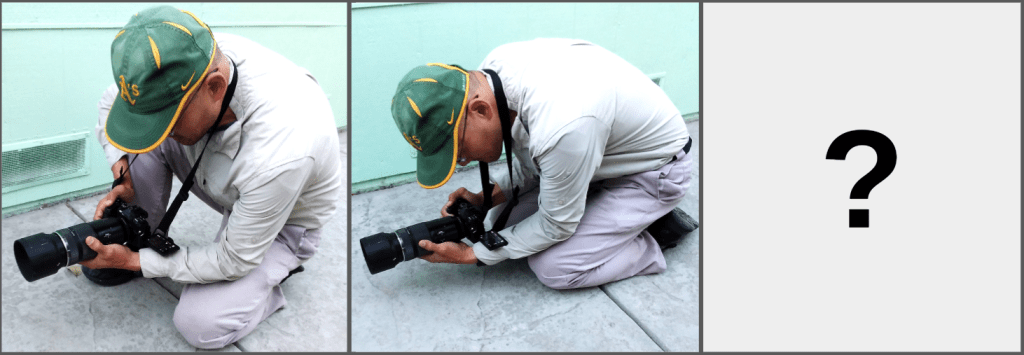
Keeling position. This is an easy position to drop into. There are now three points of contact: both feet and a knee. Your hind foot can be resting on the instep or the ball of the foot. Note the elbow is resting on the knee for stability, but avoid bone-on-bone contact, as this causes movement. It is fairly easy to adjust your point of aim from this position.
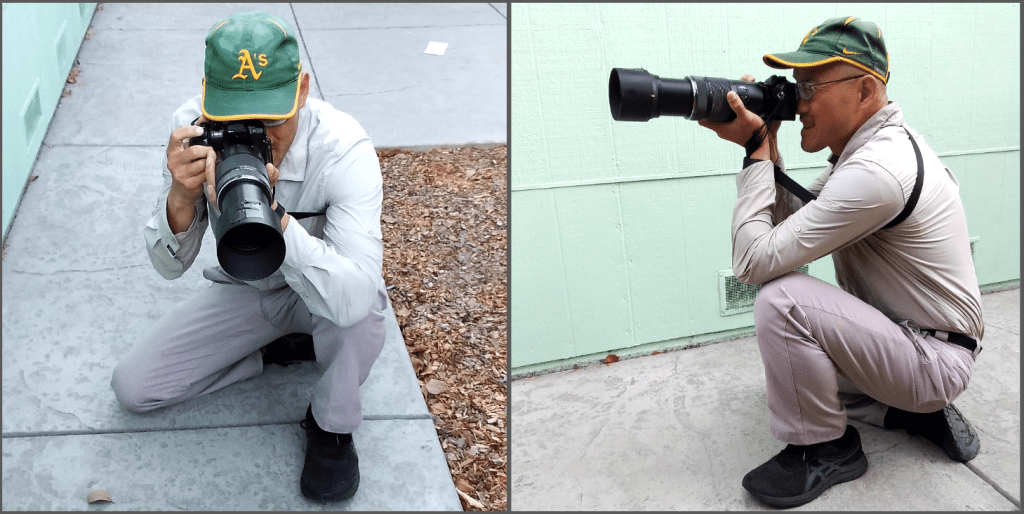
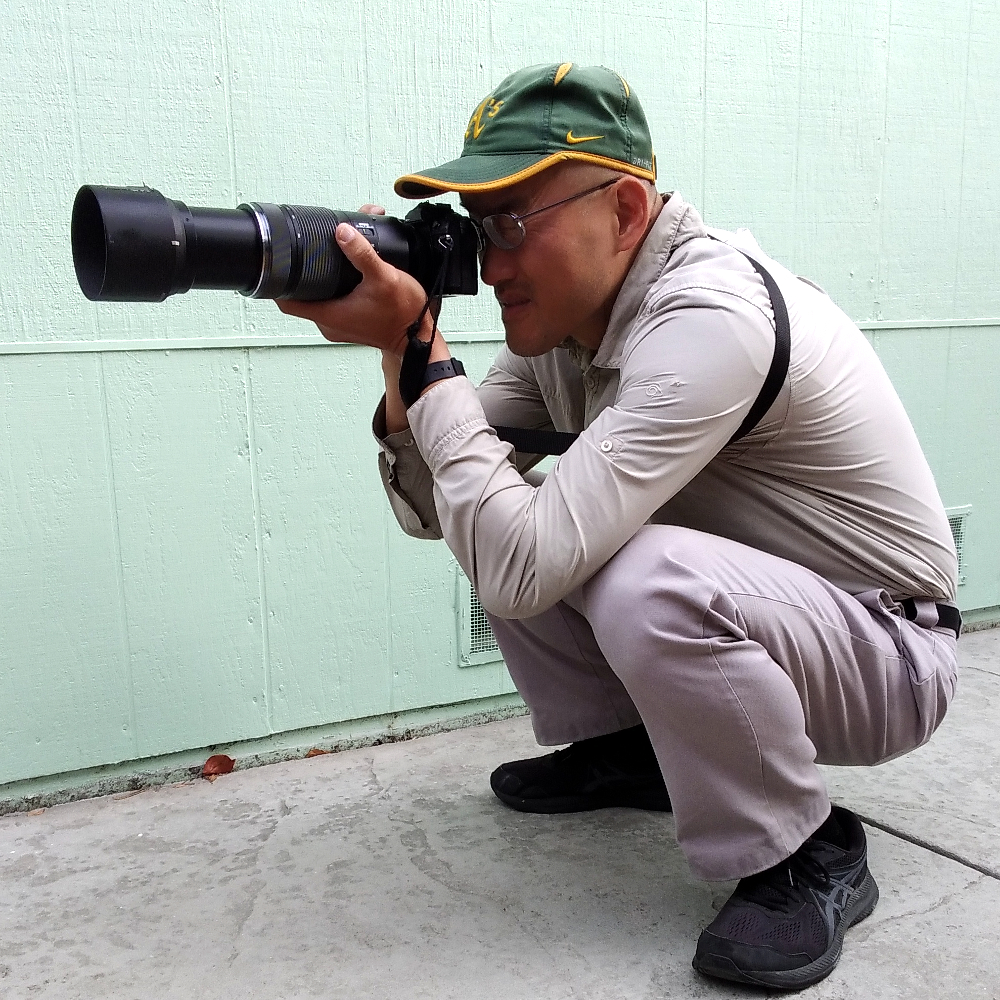
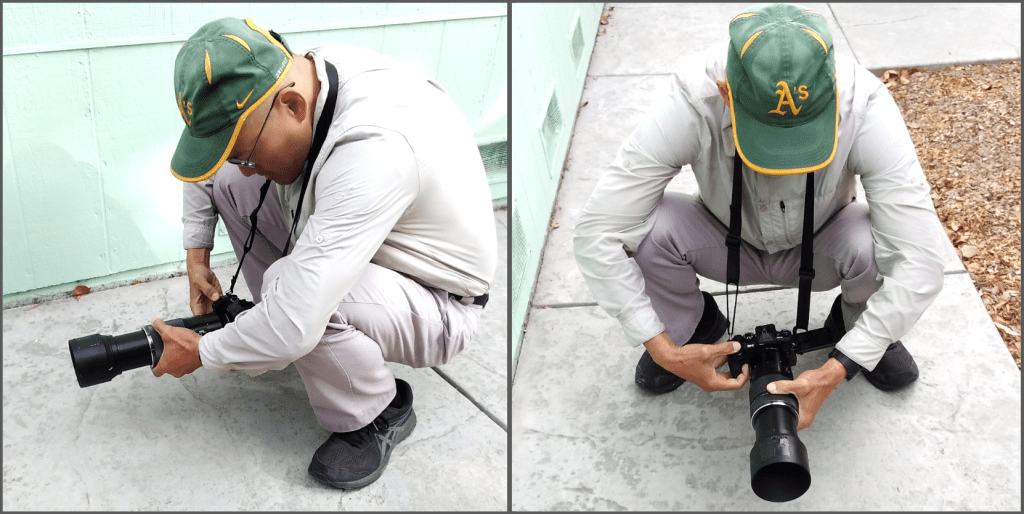
Squatting position. I can get almost as low as sitting position, and it is faster and cleaner. It takes time to develop hip flexibility, so the more you do it, the easier it gets. I can hold this position for several minutes before my legs start going numb. Elbows are supported on the knees. Even though there are only two points of contact, a low center of gravity helps with stability. Adjusting point of aim can be awkward, requiring one to waddle like a duck.
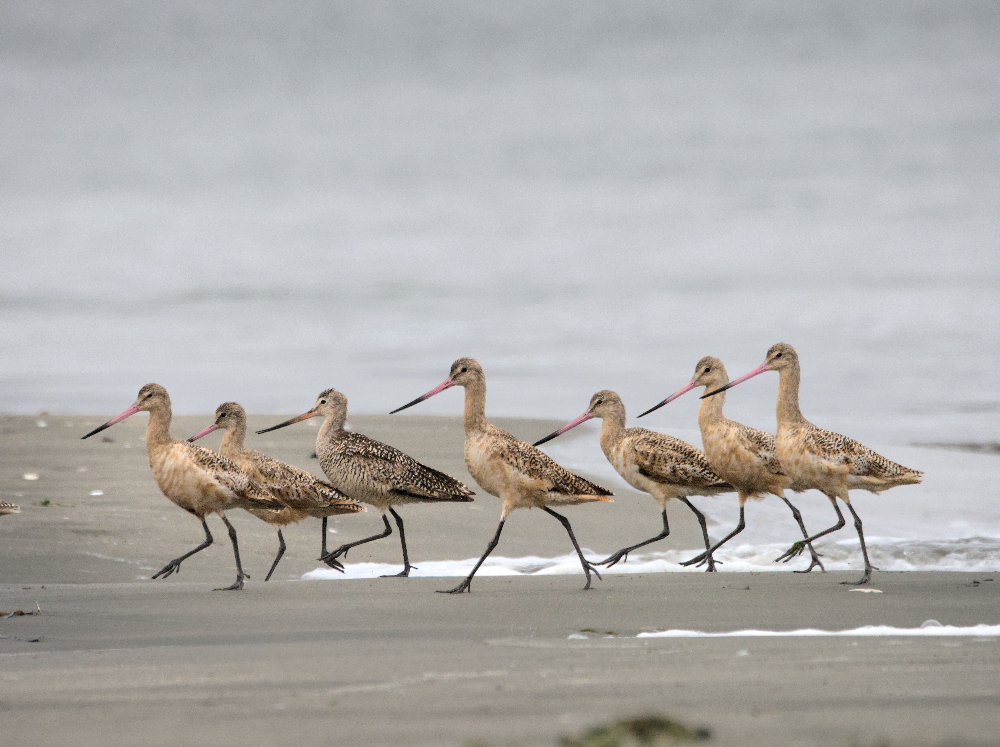
For shorebirds and others that forage on the ground, I often use the squatting position for a low perspective. Here is an image of marbled godwits that I took from squatting. They were moving quickly, so speed was essential.
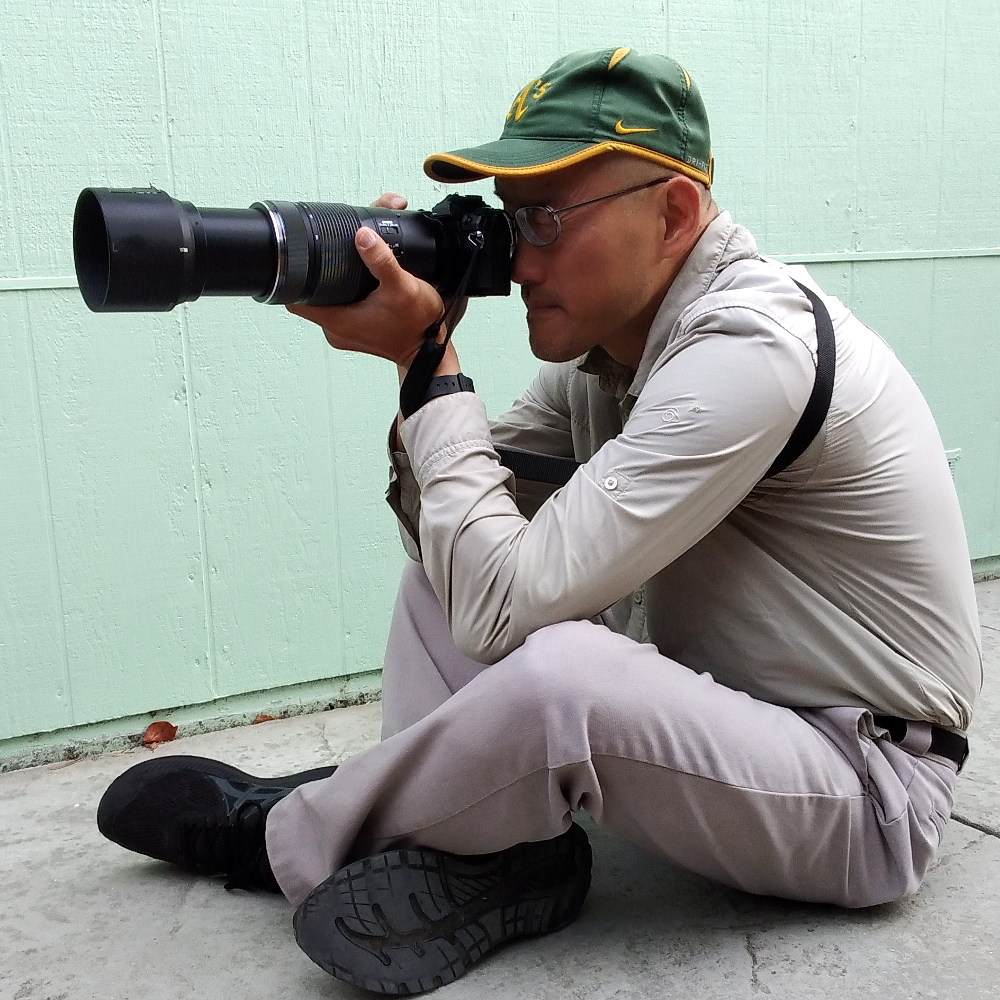
Sitting position. This is almost as stable as prone. You can cross or uncross your legs, tuck them in as close as you like. Again, both elbows should be resting near your knees. Adjusting your point of aim is now harder. Small adjustments can be made by moving the feet without picking up your behind.
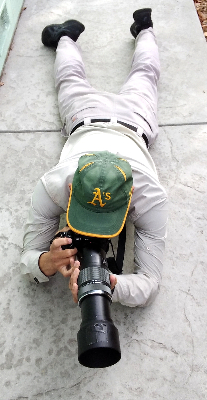
Prone position. This is the sexy position you see all over social media. People dressed in camo, belly crawling to get the perfect photo. I find it very awkward and I live in a tick infested area. It does help you sneak up on your subjects without spooking them. This also gets you closest to the ground for fabulous shots of wading birds. Both elbows are down, and the legs are spread. Some folks like their legs straight, others like to bend their right knee. It is possible to use the hasty sling in prone with a little practice, although it may be superfluous given the inherent stability of the position. One variation would be to lay on your side, holding the camera in a portrait position.

Low squat. I admit, this is fiddly and in need of refinement. It is not very stable, requiring a faster shutter speed for sharp images. However, it does let you get lower than prone, without getting dirty. Note that the sling is worn around the neck for more length. I am using the LCD to compose and focus. My elbows are braced on my knees. I find it easiest to press the shutter with my thumb, but it lessens control. I tend to teeter in this position, making it difficult to line up a shot.
This works best when the subject is stationary. Here is an image of a long tailed duck from this position:

Experiment
Combine these ideas to come up with something better.
Conclusion
All of this takes practice, patience, and self awareness to develop. If you combine all the techniques in this article, you should be maximizing the number of keepers in challenging conditions. In theory, these techniques should also help with multi-exposure processes, like pre-capture, focus bracketing, HDR, and Hi-Res mode. Is this as stable as a tripod? Definitely not. However, with modern image stabilization, these techniques are enough for me to leave the tripod at home.
Visit my Printify shop for prints of my best photos.
