Star hopping is the old fashioned way to aim your telescope at a celestial object. Nowadays, there are computerized scopes that will point to your object at the touch of a button. I’m a bit of a traditionalist, and I will avoid motors, batteries, and microchips to avoid extra weight, cost, and complexity.
What you need to star hop
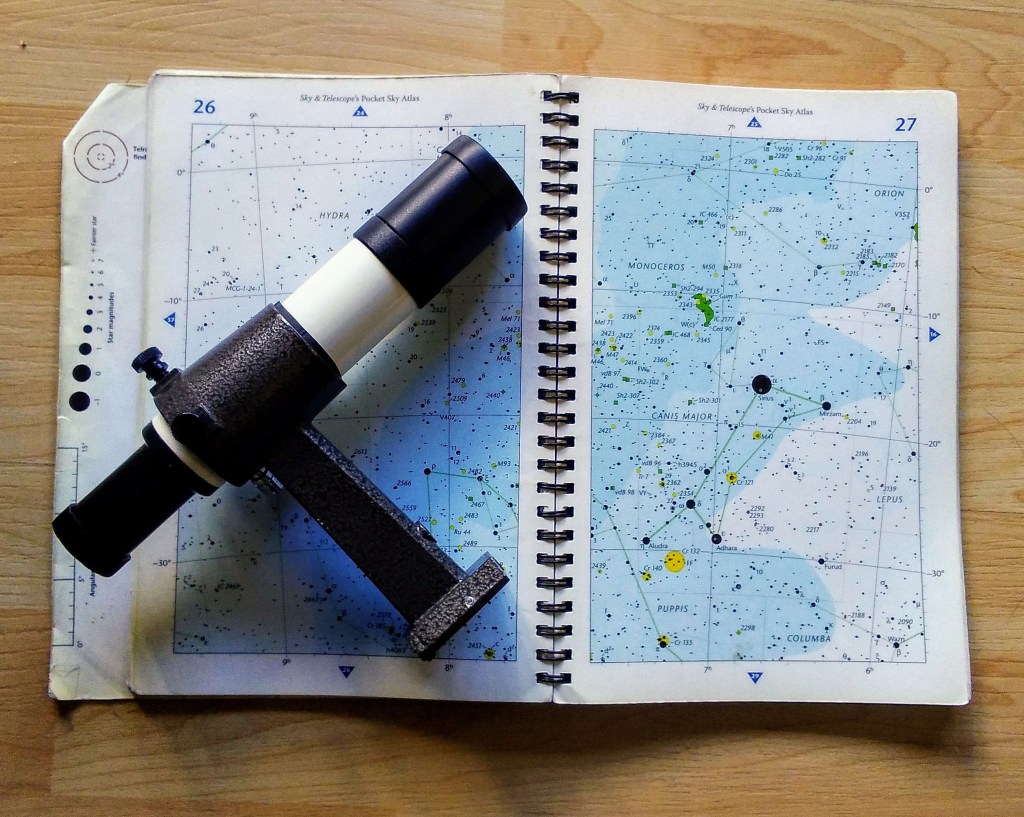
Star map – I have always used the Sky and Telescope Pocket Sky Atlas. It shows the sky in sufficient detail for me to find my object. Constellations are drawn, and the brightest stars are named. The magnitude (brightness) of stars is indicated by the size of the dots; the larger the dot, the brighter the star. Anything you want to observe is marked: galaxies, nebulae, star clusters, double stars, and so on.
Finder scope – To my dismay, most beginner scopes are shipping with red dot finders that do not magnify or collect light. These work okay in dark skies, or for very bright objects in the city. As light pollution increases, and more folks move to the city, a red dot finder is a poor choice. It only makes sense as a cost-saving measure for manufacturers… shame on them. A 30 mm or 50 mm finder scope will allow you to navigate by dimmer stars that you cannot see with the naked eye. However, purchasing a replacement finder scope will cost you around $40 or more. Some finder scopes will invert the image, requiring you to flip your map upside-down to match the view (it’s not a big deal). The nicest finder scopes are right-angle, correct image (RACI), because their view is right side up, and you look through it at the same angle as your telescope. Straight-through finder scopes work just fine, it just takes more contortion to look through them. Your finder scope will need to be aligned to the main optics to your telescope. Use your lowest power eyepiece and center on something bright and stationary, like a light down the street. In your finder scope, turn the adjustment knob until the cross hairs cover the same light. Re-check the centering in your eyepiece, and that’s it. You can use a bright celestial object, like the moon, but work quickly, because everything is moving due to the earth’s rotation.
Technically, you can star hop with your telescope using its lowest power eyepiece. It would be rather tedious, because of its narrow field of view. A finder scope at 6x to 9x will get you there much quicker.
Red flashlight – You will need something to read your map by. The color red will affect the dark adaptation of your eyes the least. You can purchase ones made especially for astronomy, or make your own. Take a relatively dim flashlight (most nowadays are too strong) and cover it with scotch tape. draw on the tape with a red permanent marker. The less light you use, the better you can see dim objects.
Know the bright stars and constellations – this part is on you. To star hop, you need a starting point, which is a bright star that is easy to find. If you mistake one bright star for another, then you’ll be lost.
Star hopping: step-by-step
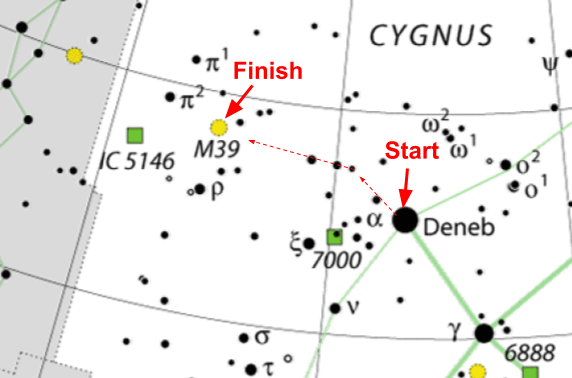
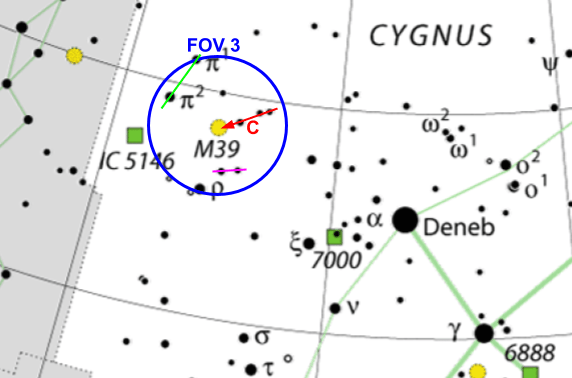
Let’s say you want to look at the star cluster M39 in the constellation Cygnus (the swan). You will start from the bright star Deneb, which is part of the summer triangle. The basic strategy will be to hop from Deneb to three stars that form a line, which points to M39 (indicated by the dashed red arrows).
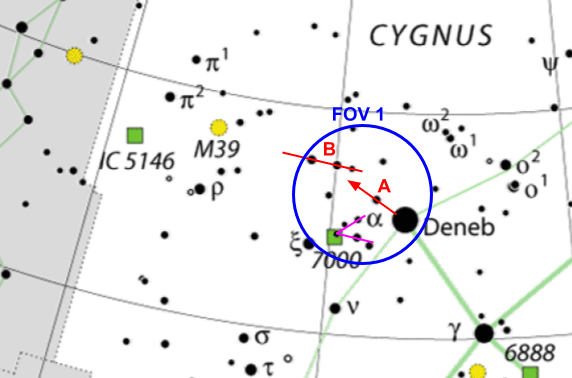
The first step is to aim at Deneb in your finder scope. Then you will cheat towards the next group of stars you want to navigate by. Try to get your field of view to match the blue circle below. Use the V-shaped asterism (shown in purple) to locate star A. Drawing a line from Deneb to A should guide you to the three stars in a line (B). Note that the first two stars are brighter than the third.
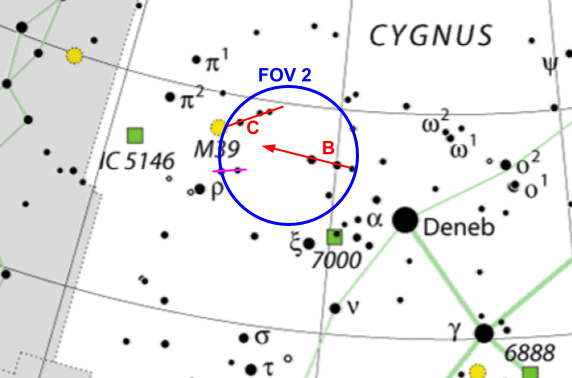
Next, you will follow the line indicated by the three stars at B. They will point you towards M39, but it lies just out of view of your finder. Use the two equally bright stars (purple line) and the three dim stars at C to verify your location.
Finally, center M39 in your finder. The three dim stars at C should point right at it. Hopefully it appears as a dim glow in your finder. Use the stars indicated by the green and purple lines to double check your position. You should also see the bright star indicated by the Greek letter rho (looks like P) at the edge of your view. Everything should match up.
You’ve done it! Enjoy the view of M39 in your eyepiece now. If you don’t see anything, re-align the finder scope and try again.
Parting advice
With practice, you will do these things almost instantaneously. Although this was a relatively easy star hop, you would break down longer hops in the same manner. In this exercise, I marked all the asterisms and pointer stars. You will need to develop the ability to pick out these “landmarks.” Always take into account the brightness of the stars on the map, because things will look more subtle in your finder scope.
See, I said you didn’t need that expensive Go-to scope.
