All images courtesy of Wikipedia
I would encourage you to seek other opinions, this is just my take. It’s also been 10 years since I have been active in this hobby, so my info might be outdated, but I doubt it. Also, I will not be recommending premium gear, just stuff that works. You can quickly dump lots of money into astronomy, but that is not what I’m about.
Before you buy a telescope, I suggest you first learn the constellations using a planisphere or an app, like Stellarium. It is important to learn the night sky, as a way of orienting yourself, but also to preserve thousands of years of our common heritage.
What should a good telescope do?
Our pupils have around a 5 mm aperture. A backyard telescope can have 80-200 mm of aperture. This does two things: gather light and increase resolving power. This means that far away objects will look brighter and be shown in more detail. To reveal faint detail in most astronomical objects, a telescope needs to have good optics. A good telescope also needs to be easy to use and maintain.
Hobby killers are things that will make you stop observing. We will consider these in the selection of a telescope.
- Not enough wow factor. Things look too dim, or small. To a certain extent, I can understand this, but astronomy is not a video game, or social media, where you are constantly bombarded by flashy images. It is quiet, contemplative, and rewards patience. That said, you can do lots of observing with a 100 mm (4″) to 200 mm (8″) telescope. Aperture snobs will say you need more, but there is the matter of portability.
- Don’t get out much. A big or complex telescope will require setup time, which takes away from observing. Large telescopes will also need to equilibrate with outside temperatures, or else you will see internal air turbulence. Telescopes larger than 200mm will be heavy and bulky, perhaps needing multiple trips between where they are stored, and where they are used. There is the concept of “grab ‘n go,” which is a small telescope you can run out the door with on a whim. I lean toward this concept, because I don’t want to fuss over equipment.
- Too hard to learn. How do you find the great globular cluster in Hercules? The sky huge, so where do you point that telescope? This is where I probably deviate from most opinions. I learned the constellations first, then I learned to navigate the sky using a process called “star hopping,” using a finder scope and a map. There is “Go-To” and “Push-To” technology, where by performing an alignment procedure using bright stars, the scope can drive itself to the object, or show you coordinates for aiming your scope. The old fashioned way I espouse has a learning curve, and I totally understand if you wish to embrace modern tech to make observing easier. I just prefer to keep things simple, and avoid dealing with batteries and motors.
A few key terms
Aperture – the diameter of the mirror or lens used on the objective (primary) optic.
Focal length – the focal length is the distance from the objective to the focused image. Each telescope has a fixed focal length.
Focal ratio – is found by dividing the focal length by the aperture. For example, if your telescope has a 100 mm objective with a 900 mm focal length, the focal ratio is 900/100, which equals 9. This is written as f/9. Why is this important? The lower the f-ratio, the more precise the optics need to be to deliver a clear image. Most low priced telescopes have a high f-ratio because they can be manufactured to lower tolerances and still provide decent images.
Eyepiece – This is the multi-lens optic you look through. It is mounted on a focuser that moves back and forth. Most telescopes come with 1.25″ eyepieces (as opposed to 2″), which are perfectly adequate. An eyepiece has its own focal length, which is the value it is sold by.
Magnification – is the focal length of the telescope divided by the focal length of the eyepiece. For example, if your telescope has a 900 mm focal length, using a 32 mm eyepiece will magnify by 900/32, which is 28.1x. The higher the magnification, the narrower the field of view, and the dimmer the image. Be wary of telescopes that claim 500x or some ridiculous magnification. It most likely has crap optics and will be unusable at the advertised magnification. Most nights, atmospheric turbulence will restrict you to far below 200x, which is the practical limit for most small telescopes. You can see plenty of detail on most objects at 100x, once you have trained your eyes. I would say lunar observing probably requires the most magnification to make out tiny details on a perfectly calm night.
Types of telescopes
Each type of telescope has its pros and cons, and I have my personal preferences.
Refractor

This is what most people think of when they picture a telescope. A pirates’s three-section telescope is a refractor, because it only uses lenses, no mirrors. The objective in a refractor is usually a doublet (2 piece sandwich) or triplet. A refractor is compact, cools quickly and stays collimated (optically aligned). There is no central obstruction as there is in other telescopes. However, glass is heavy, and refractors tend to use long tubes, because the optical path is not folded by mirrors. This means that a refractor with a greater than 300 mm (6″) objective is usually housed in an observatory. Refractors also suffer from chromatic aberration. When you bend light through glass, the colors of light separate. When looking at a bright object, like Jupiter, you will see a purple halo, because the color purple is out of focus. Some folks really decry the purple halo, others learn to live with it. Apochormatic (APO) refractors made with ED (extra dispersion) glass will have better color focus, but they are expensive. Having a long f-ratio will also limit chromatic aberration in refractors.
Reflector

The most popular type of reflector was designed by Sir Isaac Newton, and is referred to as a Newtonian telescope. This design uses a curved main mirror (usually parabolic) and a flat secondary mirror to reflect light into your eyepiece. The secondary mirror is mounted on vanes in the center of the optical tube, which is known as a central obstruction. The reflector has no chromatic aberration, but the vanes create diffraction spikes on bright objects, and the central obstruction slightly decreases contrast. A reflector will give you the most aperture for the dollar, which is a big plus. A reflector might need collimation, which is alignment of the main mirror to the secondary. This can be done with simple tools and is not to be feared. If you handle your telescope with care (and don’t do a lot of traveling), you should not need to collimate it. Large reflectors tend to have very low f-ratios. Anything below f/4 should be avoided for a beginner because it tends to be very costly to make such an optic.
Catadioptric

Catadioptric, or “cats” for short, are the telescope that look like giant coffee cans. They have a corrector lens, primary mirror, and secondary mirror. Focusing is done by moving the primary mirror, not the eyepiece. Because of the folded optical path, they pack a lot of aperture in a small package. I reckon they are popular for Go-To scopes because they are compact and easy to motorize. Popular styles of catadioptric telescopes are Schmidt-Cassegrain and Maksutov. I have steered clear of these scopes because they have the largest central obstruction. Also, they are complex, and are more likely to fail than simpler designs. They also tend to have a long focal length, which is good for high power viewing, but not low power. For a beginner, you want a well rounded scope to view a variety of objects. These are very much usable scopes, but just not my cup of tea.
Telescope Mounts
The other half of a telescope is its mount. You are not going to hold it in your hand like a pair of binoculars. Before we get into mounts, it’s important to understand how stars appear in our eyepiece. If you leave the shutter of a camera open long enough, it will record star trails due to the earth’s rotation. In our telescope’s eyepiece, a star will glide through our field of view, assuming our scope is not driven by a motor.

The tripod your mount sits on needs to be stable enough not to vibrate in a breeze, or when you touch the telescope. The heavier the scope, the heavier the tripod needed. Overall weight can get quickly out of hand when you size up in scopes.
Alt-az mounts
Alt-az (altitude-azimuth) mounts are simple to conceive. Think of a tank’s main gun; it tilts up and down (altitude) and the turret rotates (azimuth). Most camera tripods feature and alt-az mount. For astronomy, some alt-az mounts have a handle, others require you to push on the telescope tube. The action needs to be smooth enough for you to center the object at high power. A herky-jerky mount will ruin your fun in no time. Some alt-az mounts have fine adjustment knobs that give you precise aiming. This is the kind I own. It is possible to have motorized alt-az mounts that drive both axes to follow the rotation of the earth.
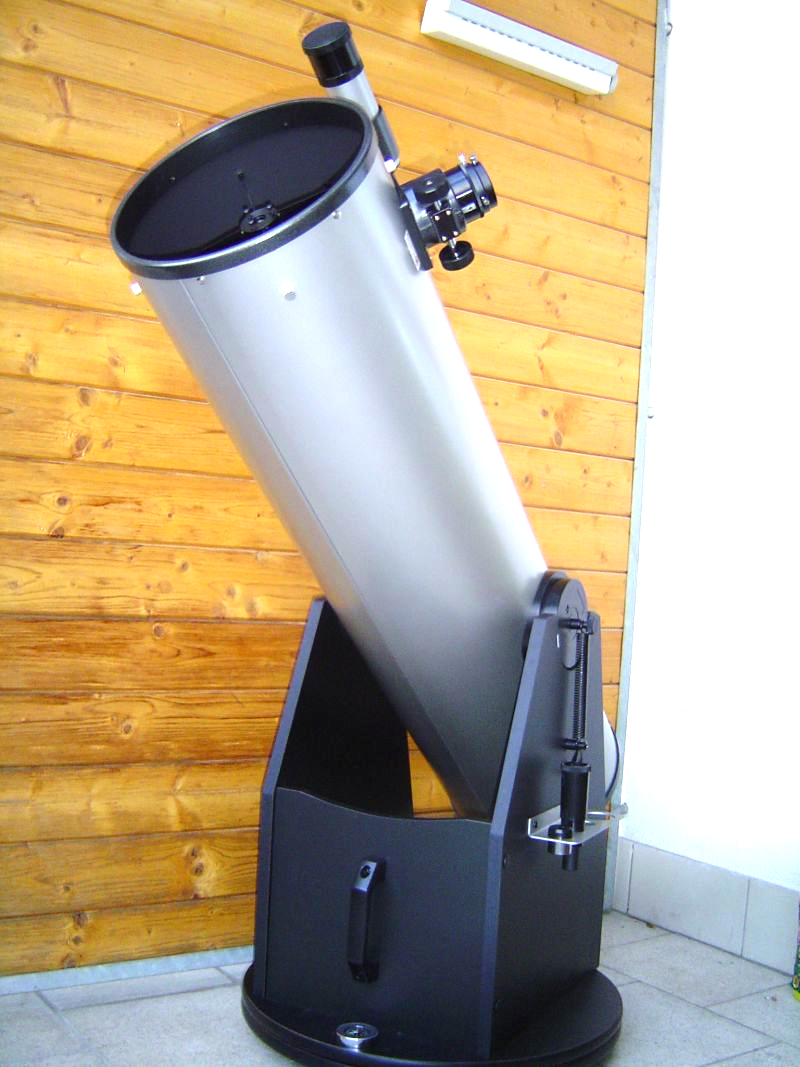
A special type of alt-az mount is the Dobsonian (dob) mount for reflectors. It is usually made of particle board, and sits on the ground or a table. The scope rides on teflon bearings, which is adequately smooth. You can understand why this style of mount is very cost-effective and is desirable in a beginner telescope. Dob mounted scopes are usually not driven, but can be equipped with sensors that give you coordinates to aim your scope to a selected object.
Equatorial Mounts
Equatorial (EQ) mounts are more complex than alt-az mounts, making them more expensive and heavy. Their main benefit is that they can follow the motion of the earth, so a motorized equatorial mount will keep the object centered in your eyepiece. This is really nice if you are holding a star party and there are multiple viewers for the same object. An equatorial mount will also allow you to take long exposure photos with a camera. Equatorial mounts take a little time to set up because they need to be polar aligned, and they require a counterweight for your scope. For a beginner scope, I would not recommend an EQ mount.
My recommendation
Thanks for reading this far! A first scope should not be a huge investment. You should be able to get a good taste of the hobby before deciding to plunk more money into it. I started on an Orion Skyquest XT4.5. It was a 4.5″ Dobsonian telescope that weighed around 20 lbs. Fifteen years ago, it cost about $150 and came with a couple of decent plossl eyepieces. I did a lot of observing with it in my first year, and it never let me down. There was enough aperture and clarity to do all kinds of observing. It was also easy to carry and toss into the back of my car. It has been discontinued, though I still recommend some kind of small dob, from 4 to 8″ in aperture. Just note that the price (and weight) goes up with aperture. If you live in an apartment, smaller is better, because you may need to navigate stairs to get to your observing site.
I would recommend either the Orion Starblast 4.5, or the Orion Skyscanner BL135 Dobsonian. They are both in the $200-$300 range; feel free to shop around for similar scopes that cost less. Orion is a respected brand, though, and I have had good luck with their products. The Starblast 4.5 is a table top scope that is good for low to mid power views, while the Skyscanner BL135 is an all-around performer.
Oddly enough, the Starblast might be the one you keep longer. It is designed to be a true grab-n-go scope (10 lbs), specializing in wide field views with its short focal length of 450 mm. Large objects like the Andromeda galaxy and the Pleiades star cluster and the milky way would be a blast with this little scope. There is always a place for a scope like this in your stable, even after you upgrade, or specialize in other observing disciplines. The only drawback is that you would be hard pressed to go over 100x for planets and lunar observing with an inexpensive f/4 reflector. If your focus is lunar and planetary observing, or if you live in a big city, go with the Skyscanner BL135.
The Skyscanner BL135 is a 5.3″ scope. You can use it your whole life and it would be enough. It weighs 32 lbs, which is fairly portable. You will probably need to separate the tube and the base to get it in your car. It comes in two different kits; you can decide if the extra accessories are worth it to you. The mirror is spherical, which is less precise than a parabolic mirror, but at long ratio of f/8.1, spherical optics will perform sufficiently. My old XT4.5 was the same design. With a 1100 mm focal length, you can get high power views and relatively wide views with inexpensive eyepieces. I can imagine that if you go for more aperture, or try a different type of telescope, the Skyscanner BL135 may gather dust. That is the price for being a jack of all trades. Note: all beginner scopes have compromises; consider the Sky-Watcher Heritage 130P or Zhumell Z130 as alternatives. They are lighter, more compact and similarly priced.
Something common to all starter scopes is a red-dot finder. I expect these are cheaper than an actual finder scope. Red dots are fine in dark skies, where you can actually see the object you want to observe. In the city, you may not be able to find your object due to light pollution. Switching to a 6x or 8x finder scope will help you see dimmer stars that can guide you to your object. If you add a larger finder scope, be aware the extra weight may cause your scope to sag. Add counter weights to the rear of your scope if this happens.
I would also recommend later on to add a lower power eyepiece and a barlow lens. A lower power eyepiece, like a 32mm plossl, will give better views of large objects, like the moon, the double cluster, and Andromeda galaxy. You may not need it with the Starblast, but it will greatly benefit the longer Skyscanner BL135. There are wider-angle eyepieces out there, but you’ll pay a pretty penny for them. A plossl eyepiece is a good overall value. A barlow lens will increase magnification by 2x. Another way to think about it is that it turns your 10mm eyepiece into a 5mm eyepiece. A few eyepieces and a barlow are all you really need for observing. In the case of the Skyscanner, a 32 mm eyepiece will give you 34x (68x with barlow), and a 10 mm eyepiece will give you 110x (220x with barlow).
Conclusion
The main thing with a telescope is to get one you want to use. If my recommendations do not excite you, find something that does. Astronomy is a hobby for a lifetime, and should be enjoyed by any means possible.
